Here is a rundown on how to install DVSwitch bridge on your AllStarLink3 node to give you access to Brandmeister DMR, TGIF DMR, Yaesu System Fusion (YSF), D-Star, and P25. We’re assuming you are familiar with Linux Command Line Interface (CLI), and already have a functioning node running ASL3. You should also have a DMR ID from radioID.net and a Brandmeister account from Brandmeister. If you do not have a DMR ID or Brandmeister account. Sign up for them now before going any further. Optionally you can also sign up for a TGIF DMR account, if wanted.
To start, you’ll open a CLI on you ASL3 node and give yourself root (You don’t have to give yourself root, but will need to sudo most every command from here on out).
sudo -sThen change directories to Asterisk.
cd /etc/asteriskCheck and see if Asterisk is running, if it is (it should be) shut it down and verify it’s status.
systemctl status asterisk
systemctl stop asterisk
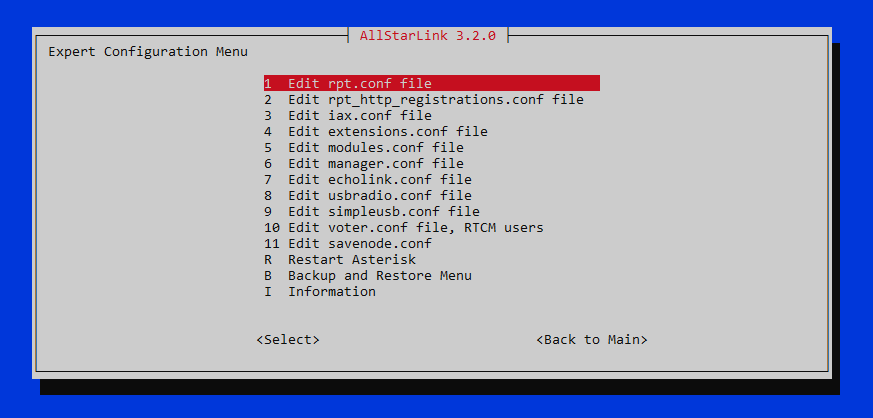
systemctl status asteriskNow you’re going to edit your repeater config file to add a private node named 1999 (This is assuming you don’t have a private node named 1999 already for some reason, if so, choose a different node number from 1001 to 1999). This node will be the bridge from your ASL3 server to the DVSwitch server. You’ll do this by copying the stanza below for the “1999” node, which is also located on the DVSwitch Groups.IO wiki, to your rpt.conf file. You can get at the rept.conf from the asl-menu in the Expert Configuration menu or via CLI.
Copy and paste the below code in the the start of your rpt.conf file:
[1999]
rxchannel = USRP/127.0.0.1:34001:32001  ; Use the USRP channel driver. Must be enabled in modules.conf
					; 127.0.0.1 = IP of the target application
					; 34001 = UDP port the target application is listening on
					; 32001 = UDP port ASL is listening on

duplex = 0				; 0 = Half duplex with no telemetry tones or hang time. Ah, but Allison STILL talks!

hangtime = 0				; squelch tail hang time 0
althangtime = 0				; longer squelch tail hang time 0

holdofftelem = 1			; Hold off all telemetry when signal is present on receiver or from connected nodes
					; except when an ID needs to be done and there is a signal coming from a connected node.

telemdefault = 0			; 0 = telemetry output off. Don't send Allison to DMR !!!!!!!!!!!!!!!!! Trust me.

telemdynamic = 0			; 0 = disallow users to change the local telemetry setting with a COP command,

linktolink = no				; disables forcing physical half-duplex operation of main repeater while
					; still keeping half-duplex semantics (optional)

nounkeyct = 1				; Set to a 1 to eliminate courtesy tones and associated delays.

totime = 180000				; transmit time-out time (in ms) (optional, default 3 minutes 180000 ms)

; idrecording = |ie			; id recording or morse string see http://ohnosec.org/drupal/node/87
; idtalkover = |ie			; Talkover ID (optional) default is none see http://ohnosec.org/drupal/node/129
Now that the private node has been added to your rpt.conf file, you’ll add the node configuration in the [nodes] stanza further down in the rpt.conf file.
Add the line in bold shown below:
[nodes]
; Note, if you are using automatic update for allstar link nodes,
; no allstar link nodes should be defined here. Only place a definition
; for your local nodes, and private (off of allstar link) nodes here.

<your main node#> = radio@127.0.0.1:4569/<your main node #>,NONE   ; This must be changed to your node number
1999 = radio@127.0.0.1:4569/1999,NONE
Exit rept.conf, you’re all finished in that file.
The next step is to modify the USRP channel driver to feed audio from one node to the other and vice versa. You’ll do this by editing the modules.conf file, which is accessible from the asl-menu or via CLI.
You’ll be changing the “noload => chan_urp.so” line to “load => chan_usrp.so”. It will looks like this in the modules.conf file:
load => chan_usrp.so ; GNU Radio interface USRP Channel DriverYou can run asterisk in the foreground and check to see both nodes are active and up and running by typing:
asterisk -cYou should see a couple lines stating the nodes are active:
NOTICE[877]: app_rpt.c:22184 rpt_master: Normal Repeater Init  1999
NOTICE[877]: app_rpt.c:22184 rpt_master: Normal Repeater Init  <your main node #>
Hit CTRL-C to exit asterisk and go back to the CLI.
Next, add the 1999 node to your extensions.conf file:
[globals]
HOMENPA = 999   ; change this to your Area Code
NODE = 2100     ; change this to your node number
NODE1 = 1999    ; This is the private node

[default]
exten => i,1,Hangup

[radio-secure]
exten => ${NODE},1,rpt,${NODE}
exten => ${NODE1},1,rpt,${NODE1}
Run asterisk in the foreground again by using the command:
asterisk -cThen while in asterisk, type:
rpt cmd <your main node #> ilink 3 1999This will link the two nodes in transceive mode. (You can also do this in Allmon or Supermon or Allscan if you want.)
Checking the stats on your main node should show you that they are connected together. You do this by typing “rpt stats <your main node #> in the asterisk CLI.
Here is mine, for example. Note the bolded line showing it is connected to 1999.
node64393*CLI> rpt stats 64393

************************ NODE 64393 STATISTICS *************************

Selected system state............................: 0
Signal on input..................................: NO
System...........................................: ENABLED
Parrot Mode......................................: DISABLED
Scheduler........................................: ENABLED
Tail Time........................................: STANDARD
Time out timer...................................: ENABLED
Incoming connections.............................: ENABLED
Time out timer state.............................: RESET
Time outs since system initialization............: 0
Identifier state.................................: QUEUED FOR CLEANUP
Kerchunks today..................................: 0
Kerchunks since system initialization............: 0
Keyups today.....................................: 434
Keyups since system initialization...............: 9781
DTMF commands today..............................: 0
DTMF commands since system initialization........: 1
Last DTMF command executed.......................: 31999
TX time today....................................: 01:41:49:803
TX time since system initialization..............: 19:05:15:235
Uptime...........................................: 73:27:03
Nodes currently connected to us..................: 1999
Autopatch........................................: ENABLED
Autopatch state..................................: DOWN
Autopatch called number..........................: N/A
Reverse patch/IAXRPT connected...................: DOWN
User linking commands............................: ENABLED
User functions...................................: ENABLED

    -- Text Message From 1999:/g$
node64393*CLI>
Now you will install the DVSwitch program. Run an update first from the Linux CLI (not the asterisk CLI).
apt-get updateCheck for errors. You don’t want to see any. If you’re good, then isntall DVSwitch next.
apt--get install dvswitch -yYou may need to answer some prompts with “yes” by hitting “y”. Make sure you’re OK to do so. If all goes well by the end of it you’ll have the MMDVM bridge, analog bridge and md380-emu modules installed on your node. You can check to see if the MMDVM bridge is loaded and will start at boot by entering the command::
systemctl status mmdvm_bridgeIt should output something like this:
root@repeater:/etc/asterisk# systemctl status mmdvm_bridge
● mmdvm_bridge.service - MMDVM_Bridge Service
   Loaded: loaded (/lib/systemd/system/mmdvm_bridge.service; enabled; vendor preset: enabled)
   Active: inactive (dead)
This shows it’s loaded and will start at boot, but is not active right now.
Move over to the MMDVM Bridge directory by entering the command:
cd /opt/MMDVM_BridgeEdit the MMDVM_Bridge.ini file to add your callsign and DMR ID.
nano /opt/MMDVM_Bridge/MMDVM_Bridge.iniAnd change the two spots in the [General] stanza to your callsign and DMR ID.
IMPORTANT NOTE: You’re going to want to add a two digit SSID to the end of your DMR ID. It can be any two digit number between 01 and 99. This will make things much easier on you later when you want to control static talkgroups from Brandmeister. So if your DMR ID is 123456 then you would enter 12345601.
[General]
Callsign=<your callsign>
Id=<Your DMR ID + two digit SSID>
Timeout=180
Duplex=0
Next, while still in the MMDVM_Bridge.ini you’ll want to enable DMR mode in the [DMR] section by changing the “0” to a “1”:
[DMR]
Enable=1
ColorCode=1
EmbeddedLCOnly=1
DumpTAData=0
You can also enable the other modes you want to use, like D-Star, P25, etc in the file. We’re not going to cover D-Star or P25, but turning them on doesn’t effect you now.
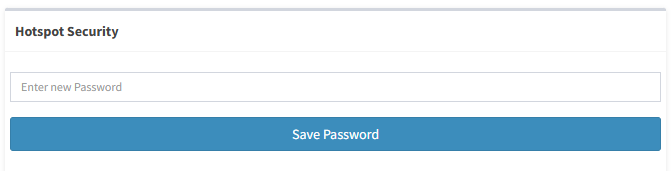
And then moving to the [DMR Network] stanza, set your Brandmeister Master server up. My server is 3104.repeater.net, but based on your location it may be different. You’ll want to look it up and make sure you’re connecting to the right one. You’ll also need your hotspot password from Brandmeister for this. It can be found or changed on the “SelfCare” page on your Brandmeister account.
This will set you up for BrandMeister’s network. You can switch to TGIF later if you want or on the fly. This is covered later on in the article here.
[DMR Network]
Enable=1
Address=3104.repeater.net (or whatever server you're supposed to connect via)
Port=62031
Jitter=360
Local=62032
Password=<your Brandmeister hotspot password>
Slot1=0
Slot2=1
Debug=0
Save your edits and exit back to the CLI. You should be able to run the MMDVM Bridge and see if everything is looking good with things by entering the command:
./MMDVM_Bridge MMDVM_Bridge.iniYou’ll see an output that looks like this below. Note the highlighted lines and ensure they are correct.
levi@node64393:/opt/MMDVM_Bridge $ sudo ./MMDVM_Bridge MMDVM_Bridge.ini
I: 2025-03-21 19:53:05.259 MMDVM_Bridge:
I: 2025-03-21 19:53:05.259 Portions Copyright (C) 2018, 2019, 2020, 2021 DVSwitch, INAD.
I: 2025-03-21 19:53:05.259 Hacks by Mike N4IRR and Steve N4IRS
I: 2025-03-21 19:53:05.259 =-=-=-=-=-=-=-=-=-=-=-=-=-=-=-=-=-=-=-=-=-=-
I: 2025-03-21 19:53:05.259 This software is for use on amateur radio networks only,
I: 2025-03-21 19:53:05.259 it is to be used for educational purposes only. Its use on
I: 2025-03-21 19:53:05.259 commercial networks is strictly prohibited.
I: 2025-03-21 19:53:05.259 Copyright(C) 2015-2018 by Jonathan Naylor, G4KLX and others
M: 2025-03-21 19:53:05.259 MMDVM_Bridge-20210520_V1.6.8 is starting
M: 2025-03-21 19:53:05.259 Built 07:24:51 May 28 2021 (GitID #3cfcf23)
I: 2025-03-21 19:53:05.259 General Parameters
I: 2025-03-21 19:53:05.259     Callsign: N8GMZ
I: 2025-03-21 19:53:05.259     Id: 320601211
I: 2025-03-21 19:53:05.259     Duplex: no
I: 2025-03-21 19:53:05.259     Timeout: 180s
I: 2025-03-21 19:53:05.259     D-Star: enabled
I: 2025-03-21 19:53:05.259     DMR: enabled
I: 2025-03-21 19:53:05.259     YSF: enabled
I: 2025-03-21 19:53:05.259     P25: enabled
I: 2025-03-21 19:53:05.259     NXDN: enabled
I: 2025-03-21 19:53:05.259 Modem Parameters
I: 2025-03-21 19:53:05.259     Port: /dev/null
I: 2025-03-21 19:53:05.259     RX Invert: no
I: 2025-03-21 19:53:05.259     TX Invert: no
I: 2025-03-21 19:53:05.259     PTT Invert: no
I: 2025-03-21 19:53:05.260     TX Delay: 100ms
I: 2025-03-21 19:53:05.260     RX Offset: 0Hz
I: 2025-03-21 19:53:05.260     TX Offset: 0Hz
I: 2025-03-21 19:53:05.260     RX DC Offset: 0
I: 2025-03-21 19:53:05.260     TX DC Offset: 0
I: 2025-03-21 19:53:05.260     RF Level: 100.0%
I: 2025-03-21 19:53:05.260     DMR Delay: 0 (0.0ms)
I: 2025-03-21 19:53:05.260     RX Level: 50.0%
I: 2025-03-21 19:53:05.260     CW Id TX Level: 50.0%
I: 2025-03-21 19:53:05.260     D-Star TX Level: 50.0%
I: 2025-03-21 19:53:05.260     DMR TX Level: 50.0%
I: 2025-03-21 19:53:05.260     YSF TX Level: 50.0%
I: 2025-03-21 19:53:05.260     P25 TX Level: 50.0%
I: 2025-03-21 19:53:05.260     NXDN TX Level: 50.0%
I: 2025-03-21 19:53:05.260     RX Frequency: 433800000Hz (433800000Hz)
I: 2025-03-21 19:53:05.260     TX Frequency: 433800000Hz (433800000Hz)
M: 2025-03-21 19:53:05.260 Opening the MMDVM
I: 2025-03-21 19:53:05.260 Display Parameters
I: 2025-03-21 19:53:05.260     Type:
I: 2025-03-21 19:53:05.260 D-Star Network Parameters
I: 2025-03-21 19:53:05.260     Gateway Address: 127.0.0.1
I: 2025-03-21 19:53:05.260     Gateway Port: 20010
I: 2025-03-21 19:53:05.260     Local Port: 20011
I: 2025-03-21 19:53:05.260     Mode Hang: 3s
M: 2025-03-21 19:53:05.260 Opening D-Star network connection
I: 2025-03-21 19:53:05.261 DMR Network Parameters
I: 2025-03-21 19:53:05.261     Address: 3104.repeater.net
I: 2025-03-21 19:53:05.261     Port: 62031
I: 2025-03-21 19:53:05.261     Local: 62032
I: 2025-03-21 19:53:05.261     Jitter: 320ms
I: 2025-03-21 19:53:05.261     Slot 1: disabled
I: 2025-03-21 19:53:05.261     Slot 2: enabled
I: 2025-03-21 19:53:05.261     Mode Hang: 3s
I: 2025-03-21 19:53:05.402 Info Parameters
I: 2025-03-21 19:53:05.402     Callsign: N8GMZ
I: 2025-03-21 19:53:05.402     RX Frequency: 433800000Hz
I: 2025-03-21 19:53:05.402     TX Frequency: 433800000Hz
I: 2025-03-21 19:53:05.402     Power: 1W
I: 2025-03-21 19:53:05.402     Latitude: 43.071602deg N
I: 2025-03-21 19:53:05.402     Longitude: -86.211853deg E
I: 2025-03-21 19:53:05.402     Height: 500m
I: 2025-03-21 19:53:05.402     Location: "Spring Lake MI"
I: 2025-03-21 19:53:05.402     Description: "ASL_DVS_Bridge"
I: 2025-03-21 19:53:05.402     URL: "https://W8CSO.org"
M: 2025-03-21 19:53:05.402 DMR, Opening DMR Network
I: 2025-03-21 19:53:05.402 System Fusion Network Parameters
I: 2025-03-21 19:53:05.402     Local Address: 0
I: 2025-03-21 19:53:05.402     Local Port: 3200
I: 2025-03-21 19:53:05.403     Gateway Address: 127.0.0.1
I: 2025-03-21 19:53:05.403     Gateway Port: 4200
I: 2025-03-21 19:53:05.403     Mode Hang: 3s
M: 2025-03-21 19:53:05.403 Opening YSF network connection
I: 2025-03-21 19:53:05.403 P25 Network Parameters
I: 2025-03-21 19:53:05.403     Gateway Address: 127.0.0.1
I: 2025-03-21 19:53:05.403     Gateway Port: 42020
I: 2025-03-21 19:53:05.403     Local Port: 32010
I: 2025-03-21 19:53:05.403     Mode Hang: 3s
M: 2025-03-21 19:53:05.403 P25, Opening INI file: DVSwitch.ini
M: 2025-03-21 19:53:05.403 P25, Setting [P25] address -> 127.0.0.1
M: 2025-03-21 19:53:05.403 P25, Setting [P25] txPort -> 34100
M: 2025-03-21 19:53:05.403 P25, Setting [P25] rxPort -> 34103
M: 2025-03-21 19:53:05.403 P25, Setting [P25] slot -> 2
M: 2025-03-21 19:53:05.403 P25, Setting [P25] RemotePort -> 6074
M: 2025-03-21 19:53:05.403 MMDVM_Bridge-20180423 is running
I: 2025-03-21 19:53:05.403 Started the DMR Id lookup reload thread
D: 2025-03-21 19:53:05.403 DMR, Sending authorisation
D: 2025-03-21 19:53:05.403 DMR, Sending configuration
M: 2025-03-21 19:53:05.403 DMR, Logged into the master successfully
This verifies your callsign is going through into BrandMeister OK. It also verifies your port and IP with the master server you entered earlier.
There is also a stanza in the DVSwitch.ini file that you can enter your BrandMeister info into, called [STFU]. This is a newer thing, and is in response to BM’s desire for all software developers to use ODMRTP to connect to BM. I’m assuming it didn’t sit well with the DVSwitch devs, because they named the module to handle it “STFU” for some reason that I can only assume is a tongue in cheek response. We’re getting a little deep into the weeds here but let’s set it up anyways. We’re not going to use it for now.
cd /opt/MMDVM_Bridge
nano DVSwitch.ini
Then scroll down to the bottom and set up the [STFU] stanza, changing the highlighted lines to your information (IMPORTANT NOTE: Even though it says to enter your DMR ID + SSID, you are going to ONLY enter your DMR ID, seven digits, and not the 9 digit DMR ID + SSID like it says to in the comments):
; Configure the BrandMeister connection
; Simple Terminal Feature Update
; Audio format is AMBE 72 bit
[STFU]                          ; Brandmeister Open DMR Terminal (ODMRT) Protocol
BMAddress = 3104.repeater.net   ; Brandmeister ODMRT server address
BMPort = 54006                  ; Brandmeister ODMRT port
BMPassword = <Your BM hotspot password>           ; Your Brandmeister password
Address = 127.0.0.1             ; Address to send AMBE TLV frames to (export)
txPort  = 36100                 ; Port to send AMBE TLV frames to (export)
rxPort  = 36103                 ; Port to listen on (import)
UserID  = 3206012               ; Your DMR ID + SSID
TalkerAlias = N8GMZ Goose       ; Max 27 characters
StartTG = 91                    ; Startup talk group
LogLevel = 1                    ; STFU log level (0=No logging, 1=Debug, 2=Message, 3=Info, 4=Warning, >
Save and exit. If you want to mess with STFU, good luck to you. I haven’t had time to mess with it and don’t know much about it. Supposedly it’s a better way, and I suspect it might give better audio, but meh, it’s really early on at this point and not a lot of documentation out there to go off of, or is over my head. YMMV.
Now we’re going to move over to the Brandmeister site and check things out, and set a static talk group.
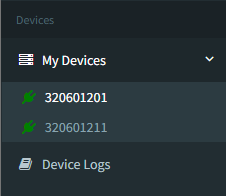
In the side menu you should see your node listed. Mine is 320601211. It should have a green plug icon next to it, showing that it’s online and authenticated.
Then scroll down the page until you see the Static Talkgroups menu:
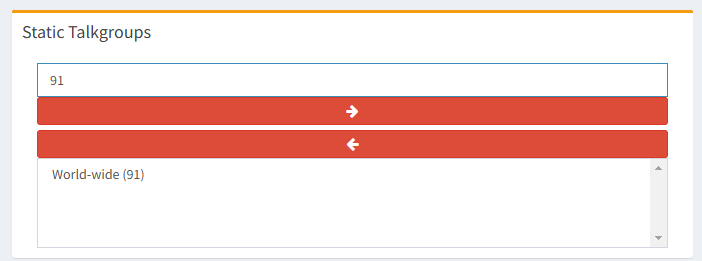
This is where you’ll enter a static talkgroup. It has been noted that DVSwitch doesn’t really do well with dynamic talkgroups on Brandmeister. It’s sort of a pain in the butt to go that route. For now, to keep things simple. You should expect to use the Static Talkgroup menu on the SelfCare page to change the Brandmeister TalkGroup that you want to join or leave.
Having successfully set up the DMR side, we’ll work on the analog bridge now. Get back into the CLI on your ASL3 node if you got out of it. Give yourself root again and check the status of the Analog Bridge with these commands (highlighted below):
root@repeater:/opt/MMDVM_Bridge# cd /opt/Analog_Bridge/
root@repeater:/opt/Analog_Bridge# systemctl status analog_bridge
● analog_bridge.service - Analog_Bridge Service
   Loaded: loaded (/lib/systemd/system/analog_bridge.service; enabled; vendor preset: enabled)
   Active: inactive (dead)
root@repeater:/opt/Analog_Bridge#
Again, like the MMDVM bridge, you’ll see the module is loaded but not active. In the analog bridge directory you’re going to need to edit the Analog_Bridge.ini file:
nano ./Analog_Bridge.iniThen go to the [General] stanza in the file and change the decoder fallback to “true”:
; General Section describes settings for Analog_Bridge itself.
[GENERAL]
logLevel = 2                            ; Show messages and above 0=No logging, 1=Debug, 2=Message, 3=Info, 4=Warning, 5=Error, 6=Fatal

; Metadata management
exportMetadata = true                   ; Export metadata to USRP partner (transcode setups require this)
subscriberFile = /var/lib/dvswitch/subscriber_ids.csv   ; DMR ID to callsign lookup data

; General vocoder setup information
decoderFallBack = true                  ; Allow software AMBE decoding if a hardware decoder is not found
useEmulator = false                     ; Use the MD380 AMBE emulator for AMBE72 (DMR/YSFN/NXDN)
emulatorAddress = 127.0.0.1:2470        ; IP address and port of the md380 server;s
Now go to the [AMBE_AUDIO] stanza and change the TX and RX ports, the gateway DMR ID, and repeater ID. Your DMR ID will your regular DMR ID, while the repeater ID will be the DMR ID + the two digit SSID you added to the end of it. The “txTg” line is the Talkgroup on Brandmeister that your traffic will be sent to. Below are my node settings with my DMR ID’s. For my node, for testing, I used BM talkgroup 91, which is the Worldwide Call group, which is usually very busy. This should be the static talkgroup you set up in Selfcare as well. You can change it later via selfcare. When you boot up your node, this is the talkground it will default to, and can be anything that works for you.
; Information for xx_Bridge (Where xx is MMDVM, Quantar, HB, IPSC)
[AMBE_AUDIO]
address = 127.0.0.1                     ; IP address of xx_Bridge
txPort = 31103                          ; Transmit TLV frames to partner on this port
rxPort = 31100                          ; Listen for TLV frames from partner on this port
ambeMode = DMR                          ; DMR, DMR_IPSC, DSTAR, NXDN, P25, YSFN, YSFW (encode PCM to this format)
minTxTimeMS = 2000                      ; Minimum time in MS for hang delay (0-10000)

; The metadata below is used when ASL is the source since it does not have any concept of digital modes
gatewayDmrId = 3206012                  ; ID to use when transmitting from Analog_Bridge
repeaterID = 311213801                  ; ID of source repeater
txTg = 91                               ; TG to use for all frames sent from Analog_Bridge -> xx_Bridge
txTs = 2                                ; Slot to use for frames sent from Analog_Bridge -> xx_Bridge
colorCode = 1                           ; Color Code to assign DMR frames
While you’re in the Analog_Bridge.ini check the [USRP] stanza and see if the TX and RX ports are correct. By default they should be, and shouldn’t need adjustment.
[USRP]
address = 127.0.0.1                     ; IP address of USRP partner (Analog_Reflector, Allstar/Asterisk or another Ana>
txPort = 32001                          ; Transmit USRP frames on this port
rxPort = 34001                          ; Listen for USRP frames on this port
usrpAudio = AUDIO_USE_GAIN              ; Digital -> Analog (AUDIO_UNITY, AUDIO_USE_GAIN, AUDIO_USE_AGC)
usrpGain = 2.50                         ; Gain factor when usrpAudio = AUDIO_USE_GAIN (0.0 to 5.0) (1.0 = AUDIO_UNITY)
usrpAGC = -20,10,100                    ; Set the agc threshold (db), slope (db) and decay (ms)
Save the edits and exit the Analog_Bridge.ini file.
You can run the Analog Bridge and check that it’s all good with no errors by using the command:
./Analog_Bridge Analog_Bridge.iniIt will output text like this below. Note the highlighted lines:
levi@node64393:/opt/Analog_Bridge $ ./Analog_Bridge Analog_Bridge.ini
I: 2025-03-21 20:24:07.338 Analog_Bridge Version 1.6.4 Mon 17 May 06:21:35 EDT 2021
I: 2025-03-21 20:24:07.338 Copyright (C) 2018, 2019, 2020 DVSwitch, INAD.
I: 2025-03-21 20:24:07.338 Created by Mike N4IRR and Steve N4IRS
I: 2025-03-21 20:24:07.338 Analog_Bridge comes with ABSOLUTELY NO WARRANTY
I: 2025-03-21 20:24:07.338
I: 2025-03-21 20:24:07.338 This software is for use on amateur radio networks only,
I: 2025-03-21 20:24:07.339 it is to be used for educational purposes only. Its use on
I: 2025-03-21 20:24:07.339 commercial networks is strictly prohibited.
I: 2025-03-21 20:24:07.339
I: 2025-03-21 20:24:07.339 Analog_Bridge is starting
M: 2025-03-21 20:24:07.339 Setting [MACROS] DMR -> /opt/MMDVM_Bridge/dvswitch.sh mode DMR
M: 2025-03-21 20:24:07.339 Setting [MACROS] DSTAR -> /opt/MMDVM_Bridge/dvswitch.sh mode DSTAR
M: 2025-03-21 20:24:07.339 Setting [MACROS] NXDN -> /opt/MMDVM_Bridge/dvswitch.sh mode NXDN
M: 2025-03-21 20:24:07.339 Setting [MACROS] P25 -> /opt/MMDVM_Bridge/dvswitch.sh mode P25
M: 2025-03-21 20:24:07.339 Setting [MACROS] YSF -> /opt/MMDVM_Bridge/dvswitch.sh mode YSF
M: 2025-03-21 20:24:07.339 Setting [MACROS] ASL -> /opt/MMDVM_Bridge/dvswitch.sh mode ASL
M: 2025-03-21 20:24:07.339 Setting [MACROS] STFU -> /opt/MMDVM_Bridge/dvswitch.sh mode STFU
M: 2025-03-21 20:24:07.339 Setting [MACROS] dbupdate -> /opt/MMDVM_Bridge/dvswitch.sh collectProcessPushDataFiles
M: 2025-03-21 20:24:07.339 Setting [MACROS] 9876 -> /opt/Analog_Bridge/parrot.sh
M: 2025-03-21 20:24:07.339 Setting [] include -> dvsm.macro
M: 2025-03-21 20:24:07.339 Setting [GENERAL] logLevel -> 2
M: 2025-03-21 20:24:07.339 Setting [GENERAL] exportMetadata -> true
M: 2025-03-21 20:24:07.339 Setting [GENERAL] transferRootDir -> /tmp
M: 2025-03-21 20:24:07.339 Setting [GENERAL] subscriberFile -> /var/lib/dvswitch/subscriber_ids.csv
M: 2025-03-21 20:24:07.339 Setting [GENERAL] decoderFallBack -> true
M: 2025-03-21 20:24:07.339 Setting [GENERAL] useEmulator -> true
M: 2025-03-21 20:24:07.339 Setting [GENERAL] emulatorAddress -> 127.0.0.1:2470
M: 2025-03-21 20:24:07.339 Setting [GENERAL] pcmPort -> 2222
M: 2025-03-21 20:24:07.339 Setting [AMBE_AUDIO] address -> 127.0.0.1
M: 2025-03-21 20:24:07.339 Setting [AMBE_AUDIO] txPort -> 31103
M: 2025-03-21 20:24:07.339 Setting [AMBE_AUDIO] rxPort -> 31100
M: 2025-03-21 20:24:07.339 Setting [AMBE_AUDIO] ambeMode -> DMR
M: 2025-03-21 20:24:07.339 Setting [AMBE_AUDIO] minTxTimeMS -> 2500
M: 2025-03-21 20:24:07.339 Setting [AMBE_AUDIO] gatewayDmrId -> 3206012
M: 2025-03-21 20:24:07.339 Setting [AMBE_AUDIO] repeaterID -> 320601211
M: 2025-03-21 20:24:07.339 Setting [AMBE_AUDIO] txTg -> 91
M: 2025-03-21 20:24:07.339 Setting [AMBE_AUDIO] txTs -> 2
M: 2025-03-21 20:24:07.339 Setting [AMBE_AUDIO] colorCode -> 1
M: 2025-03-21 20:24:07.339 Setting [USRP] address -> 127.0.0.1
M: 2025-03-21 20:24:07.339 Setting [USRP] txPort -> 32001
M: 2025-03-21 20:24:07.340 Setting [USRP] rxPort -> 34001
M: 2025-03-21 20:24:07.340 Setting [USRP] usrpAudio -> AUDIO_USE_GAIN
M: 2025-03-21 20:24:07.340 Setting [USRP] usrpGain -> 2.50
M: 2025-03-21 20:24:07.340 Setting [USRP] usrpAGC -> -20,10,100
M: 2025-03-21 20:24:07.340 Setting [USRP] tlvAudio -> AUDIO_USE_GAIN
M: 2025-03-21 20:24:07.340 Setting [USRP] tlvGain -> 1.1
M: 2025-03-21 20:24:07.340 Setting [DV3000] address -> 127.0.0.1
M: 2025-03-21 20:24:07.340 Setting [DV3000] rxPort -> 2460
I: 2025-03-21 20:24:07.340 Open UDP listener on 127.0.0.1:31100
I: 2025-03-21 20:24:07.340 Open USRP on 127.0.0.1:32001
M: 2025-03-21 20:24:07.340 Connecting to DV3000 hardware......
W: 2025-03-21 20:24:07.429 DV3000 did not reset at 127.0.0.1:2460
W: 2025-03-21 20:24:07.429 DV3000 not found at 127.0.0.1:2460 (Reset failed)
Project 25 IMBE Encoder/Decoder Fixed-Point implementation
Developed by Pavel Yazev E-mail: pyazev@gmail.com
Version 1.0 (c) Copyright 2009
This program comes with ABSOLUTELY NO WARRANTY.
This is free software, and you are welcome to redistribute it
under certain conditions; see the file ``LICENSE'' for details.
I: 2025-03-21 20:24:08.480 Subscriber IDs loaded: 279577
I: 2025-03-21 20:24:08.480 Default extended metadata <N8GMZ>
I: 2025-03-21 20:24:08.480 Connecting to emulator on host 127.0.0.1:2470
W: 2025-03-21 20:24:08.480 Using software MBE decoder version 1.2.3
W: 2025-03-21 20:24:08.480 Using software OP25 IMBE/AMBE vocoder
I: 2025-03-21 20:24:08.480 Sending to USRP clients at 127.0.0.1 on port(s) 32001
I: 2025-03-21 20:24:08.480 Sending PCM to  clients at 127.0.0.1 on port 2222
I: 2025-03-21 20:24:08.480 Starting TLV --> Analog_Bridge (decoder) --> USRP thread
I: 2025-03-21 20:24:08.480 Starting USRP --> Analog_Bridge (encoder) -> TLV thread
Now that we’re setup on both the DMR and analog sides, we’re going to test everything out together. Make sure you’re running as root here:
sudo -sThen switch to the asterisk directory and run asterisk in the foreground:
cd /etc/asterisk
asterisk -c
Turn on more in-depth logging once you’re in asterisk by typing this at the asterisk CLI:
rpt debug level 6Leave asterisk running in that CLI window and open another CLI window to get into the Analog Bridge:
sudo -s
cd /opt/Analog_Bridge
./Analog_Bridge Analog_Bridge.ini
This will run the Analog Bridge in the foreground. Leave it open and running and start another CLI instance in a new window for the MMDVM Bridge:
sudo -s
cd /opt/MMDVM_Bridge
./MMDVM_Bridge MMDVM_Bridge.ini
You should now have three CLI windows open with the services running in them. If there is traffic on the talkgroup, you should see it, without errors. You may see a “chan_usrp” warning for “Receive queue exceeds the threshold of 320” in the asterisk CLI. You can ignore that error. It is a known issue with ASL and shouldn’t affect things.
If there is no traffic in the TG that you’re on, you can make a TX into it on your AllStarLink node. You may need to go into Allmon, Supermon, or Allscan and connect the node to node 1999 first, if it is not already connected.
Check your MMDVM Bridge window and look to see that it’s showing the TX. Here is the log from another guide for an example:
M: 2018-06-04 15:51:24.087 MMDVM_Bridge-20180423 is running
I: 2018-06-04 15:51:24.087 Started the DMR Id lookup reload thread
D: 2018-06-04 15:51:34.153 DMR, Sending authorisation
D: 2018-06-04 15:51:34.210 DMR, Sending configuration
M: 2018-06-04 15:51:34.246 DMR, Logged into the master successfully
M: 2018-06-04 15:52:04.825 DMR Slot 2, received network voice header from N4IRS to TG 311222
M: 2018-06-04 15:52:05.380 DMR Slot 2, received network end of voice transmission, 0.5 seconds, 0% packet loss, BER: 0.0%
In the Analog Bridge window you should see something like this:
I: 2018-06-04 15:51:37.781 Starting USRP --> HB_Bridge thread
I: 2018-06-04 15:52:04.825 Begin TX: src=3112138 rpt=0 dst=311222 slot=2 cc=0
And in the asterisk CLI window you should see something like this:
[Jun  4 11:26:40] NOTICE[1858]: app_rpt.c:22184 rpt_master: Normal Repeater Init  1999
[Jun  4 11:26:40] NOTICE[1858]: app_rpt.c:22184 rpt_master: Normal Repeater Init  2100

*CLI>rpt debug level 6
app_rpt Debugging enabled, previous level: 0, new level: 6

*CLI> [Jun  4 11:52:04] NOTICE[2051]: app_rpt.c:20965 rpt: **** rx key
[Jun  4 11:52:04] NOTICE[2051]: app_rpt.c:21076 rpt: **** rx un-key
[Jun  4 11:52:04] NOTICE[2051]: app_rpt.c:20965 rpt: **** rx key
[Jun  4 11:52:04] NOTICE[2051]: app_rpt.c:21076 rpt: **** rx un-key
This is letting you know that things are getting to and from where they need to go.
For further testing you can send a tone out and check that it is being received by sending the command below in the asterisk CLI:
rpt cmd 1999 cop 4 1999Then move to the Analog Bridge CLI window and look for something like this:
M: 2018-06-05 14:03:09.787 PTT onAnd in the MMDVM Bridge CLI window:
M: 2018-06-05 14:05:13.971 DMR, TX state = ON
I: 2018-06-05 14:05:13.971 DMR, Begin TX: src=3112138 rpt=311213805 dst=311222 slot=2 cc=1 metadata=3112138
Now you have to toggle off the tone (It will stay on!) Go back to the asterisk CLI and enter:
rpt cmd 1999 cop 4 1999It’s the same command to turn the tone on as it is to turn it off.
While you’re in the asterisk CLI, put the logging level back to something that won’t fill up as fast:
rpt debug level 0Now that we know everything is working we can make some other tweaks to things, like having your ASL3 node automatically connect to the DVswitch bridge on startup. This is optional, and you don’t have to do it if you don’t want.
cd /etc/asterisk
nano ./rpt.conf
Once in the rpt.conf file edit the stanza for your main node number, which, for me is under [63494]
startup_macro = *31999Save and exit the rpt.conf file.
Now we’re going to turn all the stuff on at once:
systemctl enable asterisk
systemctl enable analog_bridge
systemctl enable md380-emu
systemctl enable mmdvm_bridge
If you don’t see anything pop up, no error messages, then it means you did it right.
And now for one final thing, you’ll want to reboot the whole thing and see if it comes back up fine.
sudo rebootOnce the node is back online, connect to node 1999 if you don’t have it automatically connecting.
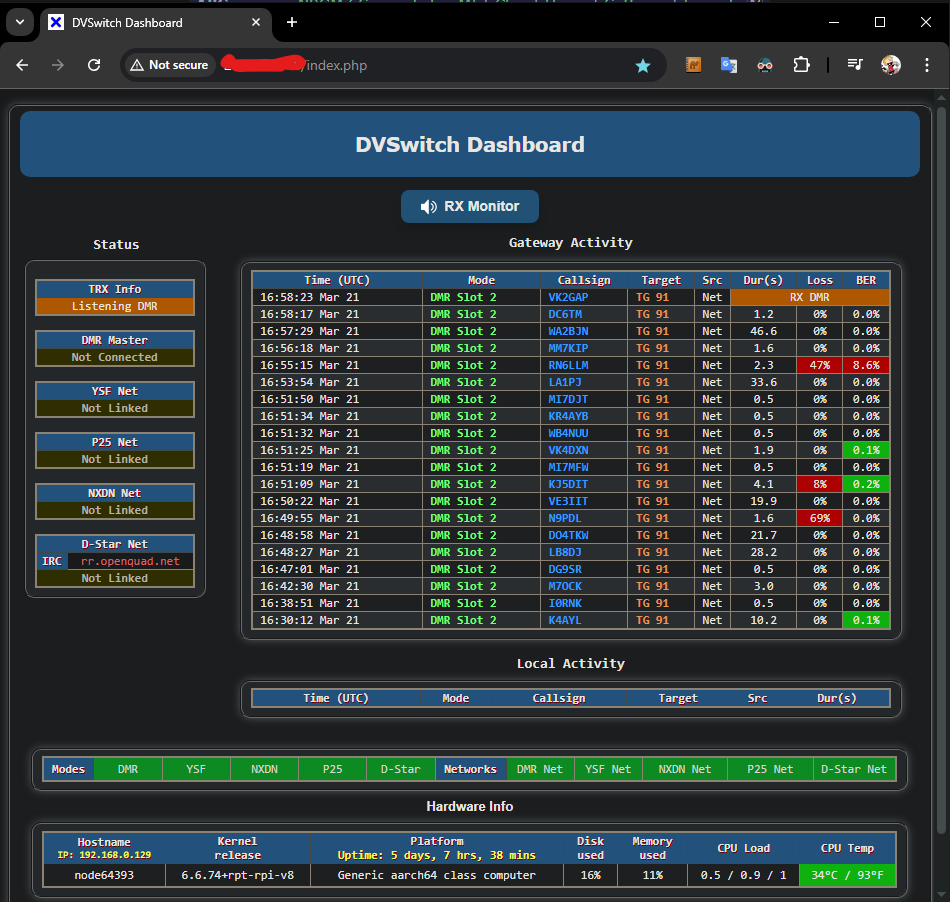
Then in a browser window, go to the address “https://<your node’s IP address>/index.php
This will bring up the DVSwitch Dashboard. You should also be hearing traffic on your Allstar if there are key ups showing in the dashboard.
If you’re not hearing traffic go into the CLI for the node and run the MMDVM Bridge, Analog Bridge, and asterisk CLI, and see if there are errors. If you did every thing right, you should be all set to use your DVSwitch bridge to talk on DMR. If you want to go back to using regular analog Allstar, just disconnect from the 1999 node and connect to another Allstar node.
OK, now that we’re up and running, and connected to a Brandmeister DMR server, we’re going to add in the TGIF server, for the TGIF DMR Network. To do this we’re going to get in to the DVS menu that I showed you earlier.
cd /usr/local/dvs
./dvs
Once in the menu go to 02 Advanced Configuration:
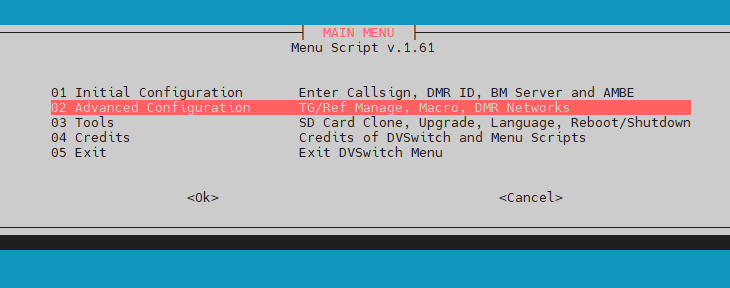
And then 24 Additional DMR Networks:
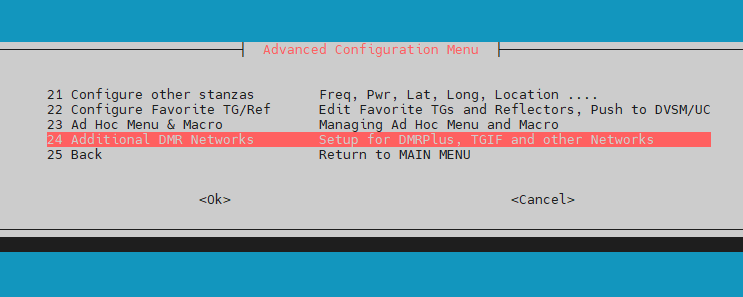
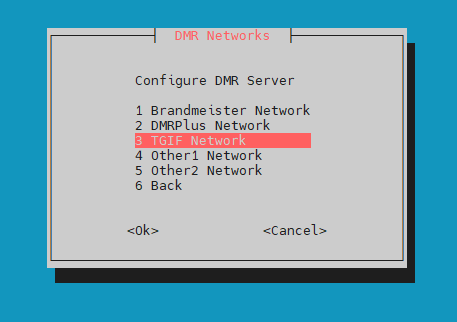
Select 2 Configure DMR Server:
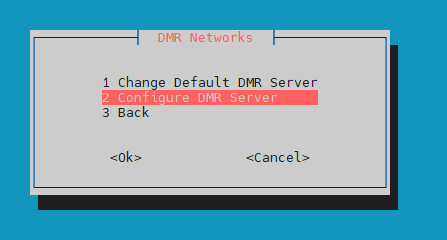
3 TGIF Network:
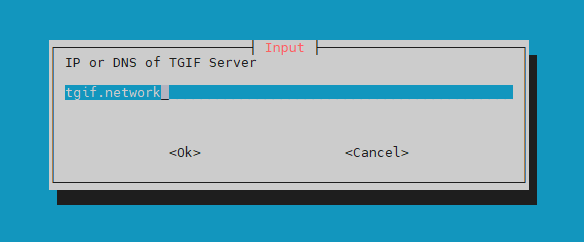
Once in the setup, enter “tgif.network” for the server:
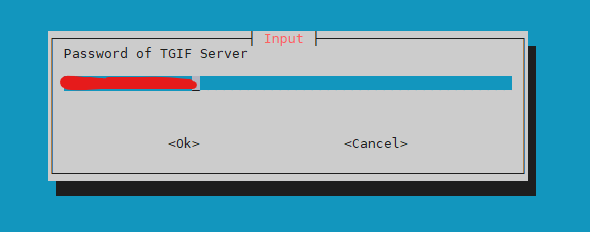
Enter your TGIF server password, found in the TGIF SelfCare on the TGIF’s website:
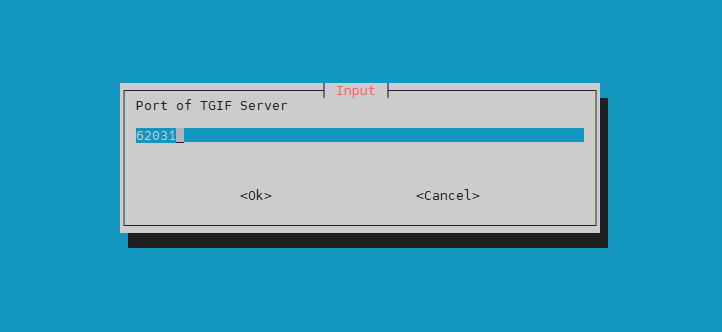
Then the port, this should be correct by default:
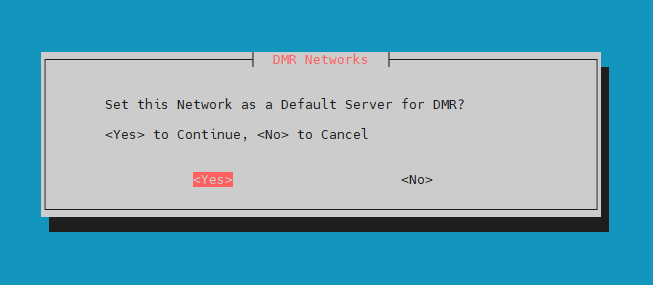
Then you can pick if the network is the default network for DVSwitch, for me I have BM as default, and only dial in to TGIF when I want to:
It should return you to the DMR Network menu and TGIF should be set up for use. You can dial into a TGIF server from the CLI now to test it out.
/opt/MMDVM_Bridge/dvswitch.sh mode DMR
/opt/MMDVM_Bridge/dvswitch.sh tune passw0rd@tgif.network:62031!0
/opt/MMDVM_Bridge/dvswitch.sh tune <TGIF Talk Group #>
Note that you should use “passw0rd” and not your own password here, to connect to TGIF.
To go back to BrandMeister you would enter the following (assuming you are still in DMR mode. If you’re in a different mode, switch to DMR before this):
/opt/MMDVM_Bridge/dvswitch.sh tune <Your BM hotspot password>@3104.repeater.net:62031!4000
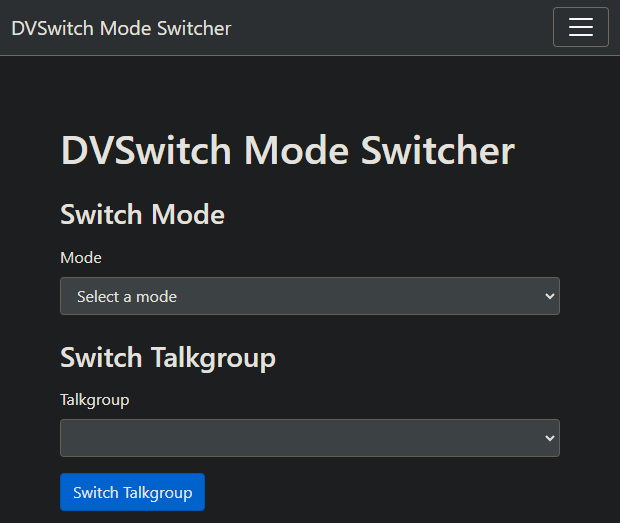
/opt/MMDVM_Bridge/dvswitch.sh tune <BM Talk Group #>OK, so now you should have DMR on BrandMeister and TGIF working. Switching between DMR masters is a little clunky, and is done via command line. People have wrote scripts to automate this, but I won’t get into that here. There is also a program called “DVSwitch Mode Switcher” that you can install, that makes switching networks and modes easier. I am not going to get into that here, and there are guides already on how to install it. I would say that it is an “advanced” thing, and recommend attempting if you feel comfortable using DVSwitch already.
The final thing I am going to touch on is the Yaesu System Fusion mode and how to use it. First edit your MMDVM_Bridge.ini file:
cd /opt/MMDVM_Bridge
nano MMDVM_Bridge.ini
Then turn on YSF by setting Enable to 1 in the below two stanzas:
[System Fusion]
Enable=1

[System Fusion Network]
Enable=1
LocalAddress=0
LocalPort=3200
GatewayAddress=127.0.0.1
GatewayPort=4200
Debug=0
Save and exit, then restart the MMDVM Bridge:
systemctl restart mmdvm_bridgeNow you can go into YSF mode and enter a Wires-X room (in this case the popular West Michigan Connect room 21335 that you can find me and many other MIRAT members on) by entering the commands:
/opt/MMDVM_Bridge/dvswitch.sh mode YSF
/opt/MMDVM_Bridge/dvswitch.sh tune 21335
Now when you key up you’ll be talking into the YSF Wires-X room West Michigan Connect.
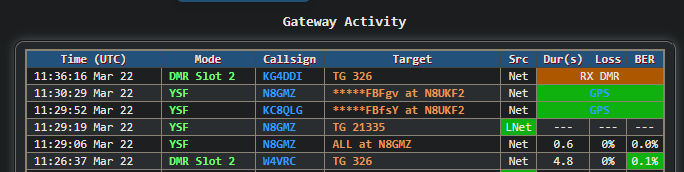
You can see your activity on the DVSwitch Gateway in the DVSwitch Dashboard.
Note that you’re also still connected to the DMR master, and will see DMR traffic. You don’t hear it though, while in YSF mode.
If you want to test your audio out on YSF, you can tune the parrot room:
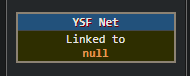
/opt/MMDVM_Bridge/dvswitch.sh tune parrot.ysfreflector.de:42020NOTE: DVSwitch Dashboard will sometimes show that YSF is connected to “null”. This seems to be a quirk, but you should be connected. Other ASL3 DVSwitch users have reported this as well and although it shows “null” it doesn’t effect things.
To go back to DMR mode you’ll use the command:
/opt/MMDVM_Bridge/dvswitch.sh mode DMRSo now you should be able to connect to any Allstar node, any BrandMeister node, any TGIF node, or any YSF Wires-X room with your ASL3 node and talk on them.
If you want to add EchoLink to your node, there is a guide here.
73,
Levi “Goose” N8GMZ